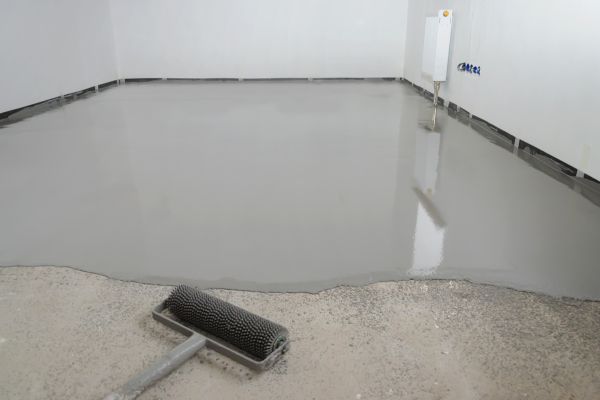
Is your floor uneven, and you’re dreading the mess of self-leveling compounds? Don’t worry! I’ve been there, and I know exactly how frustrating it can be.
You can use several methods to level a floor without traditional self-leveling compounds, including plywood underlayment, floor patch, shims, or even a mud bed, depending on the severity of the unevenness and the type of flooring you plan to install.
I remember staring at my wonky living room floor, wondering if I’d ever get it right. It turns out, there are plenty of options beyond the typical self-leveling solutions, and I’m going to share them with you.
What can I use instead of self-levelling compounds?
Dealing with an unlevel floor can feel like a huge obstacle, but pouring self-leveler isn’t your only option. There are other effective ways to get that smooth surface you need.
Instead of self-leveling compounds, you can use materials like thin-set mortar, floor patch, or even shims with plywood to create a level subfloor, depending on the degree of unevenness and the specific requirements of your new flooring.

When I was tackling my basement renovation, I learned a lot about creative leveling. Here are some of the go-to methods I’ve personally found helpful when self-leveling compound just wasn’t the right fit.
What is floor patch?
Floor patch is a cement-based product, thicker than self-leveler. You mix it with water, then trowel it onto low spots. I found it great for smaller areas. It lets you build up layers gradually. It also sets faster than self-leveler. This means less waiting time. You need to be precise when you apply it. This product does not self-level. You have to spread it evenly. Floor patch works well for minor dips. It is also good for filling cracks. You can feather the edges smooth. This makes a seamless transition.
| Pros of Floor Patch | Cons of Floor Patch |
|---|---|
| Good for small, shallow areas | Requires manual spreading |
| Fast drying | Can be labor-intensive |
| Less messy than wet leveler | Not ideal for large areas |
| Cost-effective for small jobs | Not truly self-leveling |
Can I use thin-set mortar?
Yes, thin-set mortar can work for small leveling jobs. It is usually for setting tiles. You can use it to fill minor low spots. I’ve used it when laying tile over a slightly uneven subfloor. You apply it with a trowel. You build up the low areas. It bonds well to concrete and plywood. It sets firmly. It also has good compressive strength. This makes it durable. Thin-set is not for major leveling. It does not flow like self-leveler. You must spread it by hand. This takes practice. It works for shallow depressions.
| Pros of Thin-Set Mortar | Cons of Thin-Set Mortar |
|---|---|
| Good for minor dips | Not for large areas |
| Strong bond | Manual application |
| Cost-effective | Not self-leveling |
| Easy to work with | Takes time to cure |
What can be used as a floor leveler?
When your floor isn’t quite flat, you have options beyond pouring a liquid compound. I’ve personally used a few different techniques to get a perfectly level surface.
You can use materials like plywood underlayment, a dry leveling compound (like sand mix), or even shims and wood fillers to level a floor, depending on the severity of the unevenness and the type of finish flooring you intend to install.

My old house had some truly challenging floors. I quickly learned that sometimes, a solid, structural solution was better than a liquid one. Let’s look at some of those alternatives.
How does plywood underlayment work?
Plywood underlayment is a great option for uneven floors. You lay sheets of plywood over your existing subfloor. I use shims underneath the plywood in low spots. This raises the low areas. You nail or screw the plywood down. This creates a new, level surface. It works well for significant dips. It also adds structural rigidity. You must use a good quality plywood. I prefer exterior grade. This prevents warping. This method is good for larger rooms. It provides a stable base. It works for many flooring types. This includes hardwood and laminate.
| Pros of Plywood Underlayment | Cons of Plywood Underlayment |
|---|---|
| Adds structural strength | Increases floor height |
| Good for significant dips | Can be labor-intensive |
| Provides a stable base | Requires precise shimming |
| Works for large areas | Can be expensive |
Can I use a mud bed?
A mud bed is an old-school method. It uses a mix of sand, cement, and water. You spread this mix over the subfloor. I’ve seen it used often in bathrooms for tile. It creates a thick, solid base. You use screed bars to level it. This is a very durable method. It also provides good sound insulation. It is best for areas with extreme unevenness. It also works well when you need a slope, like a shower pan. This method is labor-intensive. It needs skill to do it right. It takes time to cure.
| Pros of Mud Bed | Cons of Mud Bed |
|---|---|
| Very durable and strong | Highly labor-intensive |
| Good for extreme unevenness | Increases floor height a lot |
| Excellent sound insulation | Requires significant skill |
| Creates a very solid base | Long drying time |
How to level floor without self leveler?
Leveling a floor without self-leveling compound takes a bit more effort, but it’s totally doable. I’ve tackled this myself on a few projects.
To level a floor without self-leveler, you can use targeted solutions like sanding high spots, shimming low spots with asphalt shingles or wood shims, or applying floor patch to specific depressions, depending on the degree and nature of the unevenness.

I remember one time, I had a high spot right in the middle of a doorway. Pouring a whole self-leveling compound seemed like overkill. Here’s what I did instead.
How to deal with high spots?
High spots can be tricky. My first step is always to identify them. I use a long, straight edge for this. You can sand down small high spots. A belt sander works great for wood subfloors. For concrete, you might need a grinder. Always wear a mask and eye protection. Sometimes, planing is an option for wood. If the high spot is significant, you may need to cut it out. Then you replace that section. This is a last resort. The goal is to make the surface uniform.
| Method for High Spots | Materials Needed | Best For |
|---|---|---|
| Sanding | Belt sander, sandpaper | Small, localized high spots |
| Grinding | Concrete grinder, mask | Concrete subfloors |
| Planing | Hand plane, power planer | Wood subfloors, moderate bumps |
| Cutting/Replacing | Saw, new subfloor piece | Very large, stubborn high spots |
Can I use shims for leveling?
Yes, shims are excellent for leveling. I use them under plywood or OSB. They are thin pieces of wood or plastic. You place them in low areas. This raises the subfloor to the desired height. You can stack them for deeper depressions. Always secure them in place. This prevents movement. Then you fasten the subfloor over them. Shims are precise. They allow fine adjustments. They are good for localized dips. They are also cost-effective. Shims work well for joist leveling.
| Pros of Shims | Cons of Shims |
|---|---|
| Precise leveling | Can be time-consuming |
| Good for localized dips | Not for large areas |
| Cost-effective | Requires careful placement |
| Easy to use | Can shift if not secured |
What is the cheapest way to level a floor?
When budget is a big concern, leveling a floor needs a smart approach. I’ve found some methods are definitely lighter on the wallet than others.
The cheapest way to level a floor often involves localized treatments like using wood shims under existing subfloor, spot-patching with basic concrete patch or thin-set mortar, or sanding down minor high spots rather than undertaking a full-floor resurfacing project.

I was once renovating a rental property, and every dollar counted. I learned quickly that a full-blown self-leveling job wasn’t always the most economical choice.
Is spot patching cheap?
Spot patching is often the cheapest option. You only buy what you need. Small tubs of floor patch are affordable. I use a trowel to apply it. This targets specific low areas. You don’t cover the whole floor. This saves on material costs. It also saves on labor time. It is quick to do. It works best for small depressions. It is not for major slopes. This method is very efficient. It is also low waste.
| Pros of Spot Patching | Cons of Spot Patching |
|---|---|
| Low material cost | Only for small areas |
| Quick application | Requires manual spreading |
| Minimal waste | Not for major unevenness |
| Easy for DIYers | Can be visible if poorly done |
How can sand mix be cheap?
Using a sand and cement mix can be cheap. It depends on the size of the area. You buy bags of sand and cement. These are inexpensive. You mix them on site. I have used this for larger, but shallow, areas. It is good for filling large, shallow depressions. You spread it with a screed. It is not as refined as self-leveler. It is a more rustic approach. This method takes practice to get right. It is also heavier. It can add significant weight. This makes it more challenging.
| Pros of Sand Mix | Cons of Sand Mix |
|---|---|
| Low material cost | Requires mixing skills |
| Good for large, shallow areas | Heavy and messy |
| Durable once cured | Not for precise leveling |
| Strong filler | Longer cure time |
Conclusion
You have many options to level a floor without self-leveler. From plywood to patch, each method suits different needs. I’ve used them all to get my floors just right.