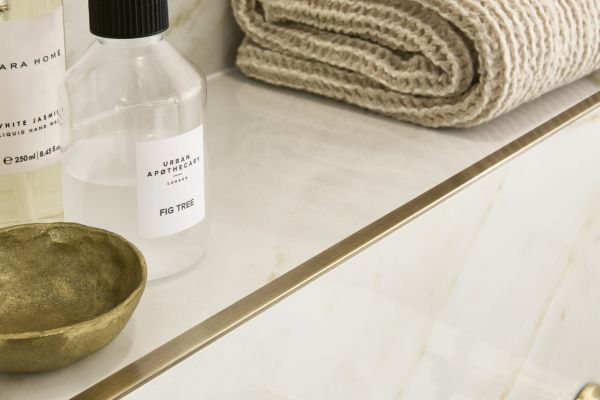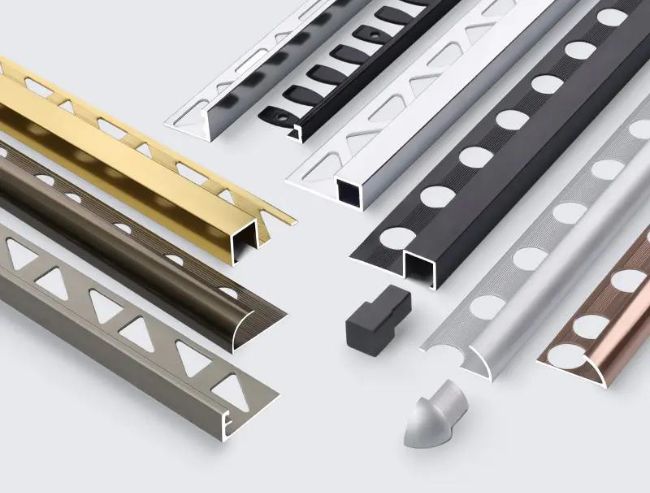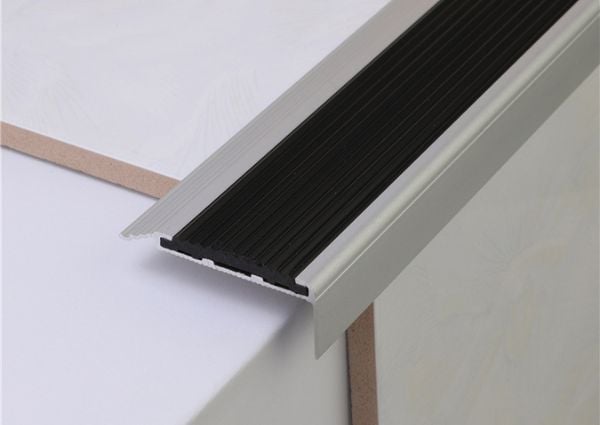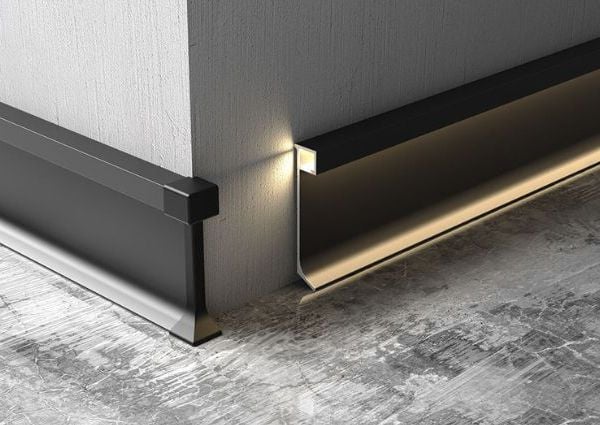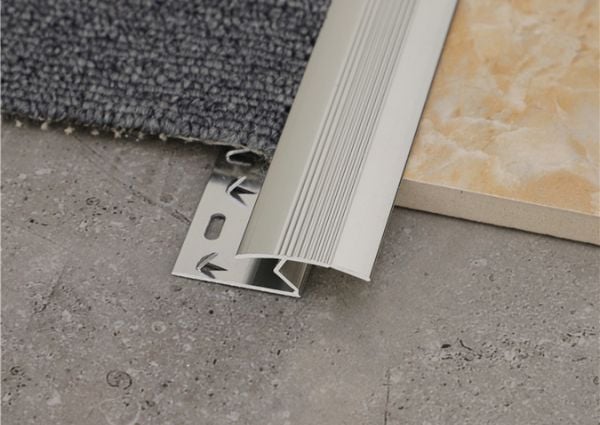

Tile trim is a specialized finishing profile used to cover, protect, and decorate the exposed edges of a tiled surface. It conceals sharp, unglazed tile cuts and prevents the edges from chipping under impact, creating a safe and seamless transition between different materials.
As a product engineer with over 10 years in the extrusion industry, I have seen how ignoring this small detail can ruin an entire tiling project. Whether you are renovating a home bathroom or managing a commercial build, choosing the wrong trim leads to cracked tiles and costly repairs.
In this guide, I will cut through the noise and show you exactly how to choose the right materials, profile shapes, and sizes for your next project.
Why Do You Need Tile Trim?
I get asked this constantly: Can I just skip the trim and polish the tile edge instead?

You can, but I strongly advise against it. From an engineering standpoint, an exposed tile edge is a structural weak point. Here are the three main reasons why installing tile trim is essential:
- 1. Edge Protection (The Bumper Effect): Ceramic and porcelain tiles are hard, but their cut edges are incredibly brittle. A metal trim acts as a shock absorber against daily impacts from vacuum cleaners or heavy foot traffic. It permanently stops your tile edges from chipping.
- 2. Built-in Safety: A freshly cut tile edge is as sharp as glass. Leaving this exposed on a shower niche or a step edge is a serious safety hazard. A proper trim completely conceals this sharp line, making the area safe to touch.
- 3. A Professional Finish: The side of a tile (the unglazed clay body) is rough and visually unappealing. Trim hides this raw edge. It provides a clean, straight line and creates a flawless transition between tile and other flooring materials, like wood or carpet.
Tile Trim Materials Compared: Which One to Choose?
When clients ask me which material to choose, my answer always comes down to two things: the application environment and the budget. Over the years, I have tested every material available.

Here is the honest breakdown of the most common options on the market today.
| Material | Durability | Best Application | Price Point |
|---|---|---|---|
| Aluminum | High | Bathrooms, commercial walls, modern floors | $$ (High Value) |
| Stainless Steel | Very High | Industrial kitchens, hospitals, heavy traffic | $$$ (Premium) |
| Ceramic / Porcelain | Medium | Traditional designs, exact tile matching | $$ – $$$ |
| Natural Stone | High | Luxury villas, premium marble installations | $$$$ (Expensive) |
| PVC / Plastic | Low | Low-budget DIY projects, temporary fixes | $ (Budget) |
- Aluminum (The Modern Standard): If you are looking for the best balance of price and performance, aluminum tile trim is the answer. It is lightweight, rust-proof, and easy to cut. Thanks to anodizing and powder coating, it offers endless colors to match modern tiles. This is what 90% of our commercial clients specify today.
- Stainless Steel (The Heavy-Duty Choice): Made from 304 or 316-grade steel, this handles extreme impacts and harsh chemicals. I always specify stainless steel tile trim for industrial kitchens or hospitals. It is highly durable but harder to cut and more expensive than aluminum.
- Brass (The Luxury Classic): Brass tile trim offers a high-end, classic look. Over time, unlacquered brass will develop a natural patina, which is highly sought after in luxury designs. It is heavy and expensive, making it a niche choice for premium projects.
- PVC / Plastic (The Budget Fix): PVC tile trim is cheap and easy to cut. But from an engineering perspective, I never recommend it for permanent commercial projects. It turns yellow, becomes brittle, and cracks easily over time.
- Ceramic / Porcelain (The Traditional Choice): Also known as bullnose tiles, these are made from the exact same clay as your main tiles. The biggest advantage is a 100% perfect color match. However, the industry is shifting away from them. They are bulky, prone to chipping over time, and if the tile manufacturer discontinues the line, you cannot find replacements for maintenance.
- Natural Stone (The Luxury Niche): When working with marble or travertine, a matching stone tile trim looks incredibly seamless. But be prepared: they are heavy to ship, fragile to handle during installation, and require regular sealing to prevent stains. We only recommend these for high-end, custom residential projects.
7 Popular Tile Trim Profiles
A manufacturer’s catalog might feature hundreds of cross-sections, but in actual construction, 95% of all projects are completed using one of these seven core profiles.

Whether you are an architect detailing a blueprint or a distributor stocking up, mastering these basics is all you need.
1. Straight Edge Tile Trim (The L-Shape)

The L-shape tile trim (often called a straight edge) is the most widely used profile for clean, minimalist decorative edges. It features an “L” shaped cross-section that sits flush with the tile, making it almost invisible once installed.
This versatile finishing trim is primarily utilized for floor transitions—such as seamlessly bridging a tile floor and a wood floor of the same height—as well as finishing the raw edges of tile backsplashes. It is particularly common in kitchens and bathrooms, especially on external corners of walls, steps, and window sills.
2. Round Edge Tile Trim (The Bullnose / Quadrant)

The round edge tile trim, classically known as a bullnose or quadrant, is the safest and most traditional choice for finishing tile installations. It features a gentle quarter-circle curve that fully wraps around the exposed tile edge, providing a soft and smooth transition.
Because it eliminates sharp right angles, it offers maximum impact protection and safety. We highly recommend this profile for window sills, kitchen countertops, or any environment with children and the elderly where safety is a top priority.
3. Square Edge Tile Trim (The Box Trim)

Square edge tile trim, or box trim, is the modern architectural standard for creating distinct, sharp 90-degree corners. Unlike the subtle L-shape, it offers a heavier, more three-dimensional look that frames the tiled area.
I frequently see this profile specified for bathroom niches and external wall corners in contemporary commercial spaces. It is also highly effective when installed horizontally as a decorative metal border (listello) between wall tiles to break up large tiled surfaces.
4. Right Angle Tile Trim

Right angle tile trim is engineered specifically to cover and protect external wall corners to form a clean, sharp 90-degree edge. It features a precise right-angle cross-section that offers robust protection against daily impacts in busy areas.
This trim is permanently anchored into the thinset or mortar during installation, ensuring a stable and enduring corner connection. It is highly common on wall corners in corridors, commercial bathrooms, and professional kitchen environments, providing a sharp geometric look while safeguarding against chipped tiles and costly repairs.
5. T Shape Tile Trim (The Transition Strip)

The T-shape transition strip is engineered specifically to cover the expansion gap between two hard floorings of the exact same height. It features a flat or slightly curved top surface with a vertical “leg” that inserts directly into the joint gap with adhesive.
It is the perfect solution for bridging the gap between a living room hardwood floor and a kitchen tile floor, ensuring a seamless look while preventing dust and debris from accumulating in the joint.
6. U Shape Tile Trim (The Channel Trim)

U-shape tile trim, also known as a channel trim, features a classic recessed “U” groove and is highly versatile in modern construction. It can serve as a sturdy, waterproof base track for heavy glass shower partitions.
Additionally, it is increasingly popular to embed this trim flush between wall tiles to create a “shadow gap”—a highly sought-after architectural effect that adds depth and linear detail to flat walls.
7. Inside Corner Tile Trim (The Cove Trim)

Inside corner tile trim, or cove trim, is specifically designed with a smooth, concave inner curve to finish the 90-degree internal junctions where walls meet floors.
By rounding out the sharp internal corner, it completely eliminates the dead space where dirt, mold, and bacteria usually build up. For this reason, it is a mandatory specification for commercial kitchens, hospitals, and public restrooms that must meet strict hygiene and sanitation standards.
How to Choose the Right Tile Trim Size?
The most common and costly mistake I see on job sites is choosing a tile trim that is the exact same thickness as the tile. If you buy a 10mm trim for a 10mm tile, it will not fit. You must account for the layer of tile adhesive (thinset) that sits between the tile and the wall or floor.
To get a perfectly flush finish, you must follow the industry’s golden sizing rule: Your tile trim depth should be 1.5mm to 2mm thicker than your tile. For example, if you are installing a standard 10mm thick porcelain tile, you need to purchase an 11.5mm or 12mm tile trim. This extra space allows the adhesive to compress properly without pushing the tile higher than the metal edge.
What happens if you get it wrong? If the trim is too small, the raw edge of your tile will stick out and remain exposed to damage. If the trim is too large, the metal edge will sit higher than the tile, creating an ugly finish and a serious tripping hazard on floors. Always measure your exact tile thickness first, add 1.5mm to 2mm, and order your profiles accordingly.
How to Bend Tile Trim for Curved Surfaces?
I see this DIY mistake constantly: someone trying to force a standard, rigid aluminum profile around a curved step by cutting notches into it with tin snips. Do not do this. Bending a standard straight profile will kink the metal, snap the extrusion, and instantly crack the anodized or powder-coated finish.

If your architectural blueprint includes curved features—like round pillars, free-form pools, or custom reception desks—you must specify Formable Tile Trim (also known as Flexible Trim).
Here is the professional approach to curved edges:
- Use Engineered Formable Profiles: These specialized trims are manufactured with a uniquely punched or serrated anchoring leg. This factory-cut design allows the metal to naturally flex and follow the radius of your curve without warping the visible finished edge.
- Gradual Shaping: Once you have the correct formable trim, do not bend it sharply over your knee. Gradually shape it by hand against the actual curved surface (or a template of the exact radius) before applying any thinset.
- Secure Anchoring: Because curved installations experience more tension, ensure the punched leg is fully embedded and heavily mortared into the adhesive to hold the shape permanently.
(If you are an architect or distributor dealing with custom curved designs, contact us at NIUYUAN. We manufacture specific formable aluminum profiles designed expressly for seamless radius bending.)
How to Calculate Tile Trim Quantities?
Calculating your trim requirement is not just about measuring the linear length of your walls. To ensure you don’t run short in the middle of a job, professionals use a specific formula based on standard extrusion lengths and cutting waste.
Here is how you should calculate your order:
- 1. Know the Standard Lengths: Architectural metal trims do not come in continuous rolls. They are extruded in straight pieces. The global industry standards are typically 2.44m (8 ft), 2.5m, or 3.0m per piece. You must divide your total linear measurement by the length of the specific profile you are buying to get your baseline piece count.
- 2. The 10% Waste Factor: Never order the exact mathematical amount. Every time you cut a profile to fit a wall, or cut a 45-degree miter for a corner, you lose material. The golden rule for contractors is to add a 10% waste margin to the total linear length. If the room has multiple complex corners and niches, increase this to 15%.
- 3. The Factory Direct Advantage (Custom Sizing): If you are specifying for a massive commercial project, using standard 2.5m lengths might result in excessive offcut waste. As a direct manufacturer, NIUYUAN can extrude and cut profiles to your exact custom lengths (e.g., exactly 2.7m per piece for a specific ceiling height). This drastically reduces your on-site installation time and overall material cost.
Essential Installation Tips for Professionals
While the complete installation process requires technical precision, there are three non-negotiable rules every project manager should oversee on the job site:

- The “Wet Set” Rule: Tile trim must be installed simultaneously with the tiles. The anchoring leg must be fully embedded into the wet thinset (adhesive) before it sets. You cannot retroactively add trim to a finished tile wall.
- Precision Cutting: For a high-end finish, always use a miter saw with a blade specifically designed for non-ferrous metals (like aluminum). This prevents the profile from deforming and ensures 45-degree corners meet perfectly without gaps.
- Avoid Over-Grouting: Never leave grout or adhesive to dry on the visible surface of the trim, especially on anodized or brushed finishes. The chemicals in cement can permanently stain or corrode the metal if not wiped away immediately with a damp sponge.
[Read our Full Step-by-Step Guide: How to Install Tile Trim Like a Pro]
Frequently Asked Questions
-
When to Install Tile Trim?
Tile trim is usually installed before laying tiles, during the tiling process, or after the tiles are fully laid. This depends on the design choices of the decoration and the type of trim, ensuring it looks good and works well. To achieve a professional finish, consider using tile edge trims that complement your overall aesthetic.
-
Things To Know While Buying Tile Trims For Edges
When buying tile trim, it’s important to pick a durable material that matches the size, thickness, and style of your tiles. Also, tWhen buying tile trim, it’s important to pick a durable material that matches the size, thickness, and style of your tiles. Additionally, think about how you’ll install it, what it needs for upkeep, and your budget. Choosing the right tile edge profiles can enhance the overall design of your space.
-
How do I cut tile trim correctly?
To cut tile trim, you usually use a tile cutter or a suitable hand cutting tool. Make sure to measure accurately for the length you need and cut carefully to ensure a seamless transition between adjacent materials.
-
What is the price range for tile trim?
The cost of tile trim depends on the material, size, and how complex the design is. PVC trim is typically the cheapest option, while metal profiles and special ceramic trims can be more expensive. Prices can range from a few dollars to tens of dollars per foot. When buying, consider the needs and budget of your whole tiling project, and compare prices from different suppliers.
-
Can I install tile trim myself or do I need a professional?
The difficulty of installing tile trim depends on how complex the project is and your DIY skills. For simple projects, like using PVC or basic metal trim, many homeowners can do it themselves. However, for complex designs or materials that need special tools and skills, like large or heavy tile trim, you might need professional installation.
Overall, selecting the right tile edge trimming can significantly impact the aesthetic appeal of your tiled area. Whether you choose a glossy ceramic pencil tile trim or a more traditional baseboard tile trim, the right choice will enhance the beauty of your tiled surface. -
What tile trim finishes and colors are available?
For aluminum, we offer Anodized (matte/glossy), Brushed (textured/premium), and Powder Coated (solid colors like Matte Black).
-
How do I clean and maintain metal tile trims?
Avoid acidic or abrasive cleaners. A simple wipe with warm water and a pH-neutral detergent is all you need to maintain the luster for decades.
-
Can I remove or replace tile trim without damaging the tiles?
Technically, no. Trim is permanently embedded in the adhesive. This is why choosing a high-quality material like aluminum or stainless steel from the start is critical—prevention is better than cure.
Conclusion
Tile trim is a critical design element that defines the quality of a finishing job. At NIUYUAN, we understand that for distributors and contractors, consistent quality and reliable supply are everything.
Ready to upgrade your supply chain? Whether you need standard profiles or custom OEM molding, our engineering team is here to help. [Contact us today to request our latest B2B catalog and free sample box.]