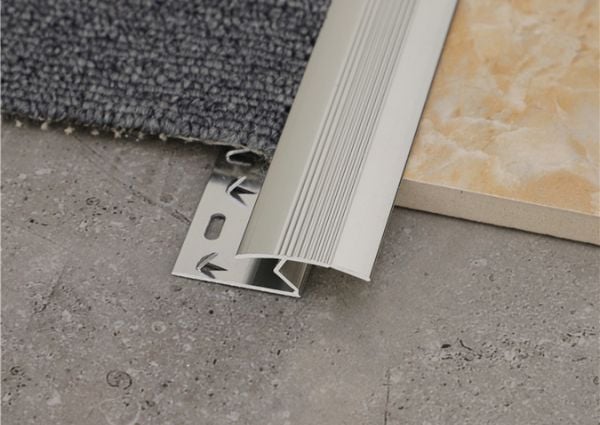

I just finished laying down some beautiful new laminate flooring in my hallway. It looks amazing! But then I hit a snag. The new laminate met the old carpet of my bedroom, and it just looked… unfinished. Worse, there was a small height difference, creating a perfect little ridge to trip over in the middle of the night. I knew right away I needed a transition strip to bridge that gap.
If you’re in the same boat, don’t worry. I’m going to walk you through everything I learned. Installing a transition strip is a key final step that makes a huge difference.
- It makes your floors safer. No one wants to trip over an exposed edge.
- It looks professional. It gives your flooring project a clean, finished look.
- It protects your floors. It guards the edges of your laminate and carpet from getting frayed and damaged.
In this guide, I’ll show you how to pick the right strip and install it step-by-step. Even if you’re new to DIY projects, you can totally handle this.
Choosing Your Transition Buddy: Picking the Right Strip
First things first, not all transition strips are the same. I learned this the hard way. You need to pick the right one for your specific floors. Let’s break down the common types.
T-Molding
A T-Molding strip looks like the letter “T” from the side.

- When to use it: This is what you need when your two floors are at the same height. It sits right in the gap between the two floors and covers the seam perfectly.
- How it works: The top part of the “T” covers the edges, and the long part goes down into the gap you left between the laminate and the carpet.
Reducer Strip
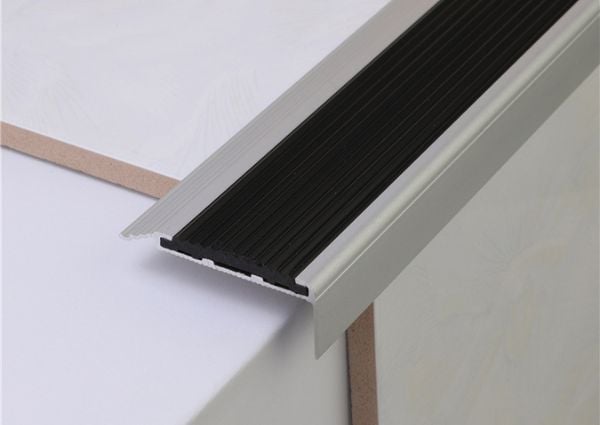
A reducer (sometimes called a threshold) is for floors with a slight height difference.

- When to use it: This was my situation. My laminate was a little bit higher than my carpet. The reducer creates a smooth little ramp from the higher floor down to the lower one.
- How it works: It slopes down gently, so you don’t catch your foot on the edge.
4-in-1 Transition Strip
A 4-in-1 strip is a super flexible option. It’s a great choice if you’re not 100% sure what you need.

- When to use it: You can cut this strip to create different profiles. It can become a T-molding, a reducer, or other types of transitions.
- Why it’s great: You get a lot of options in one package. It’s almost foolproof for a DIY project.
Carpet Gripper or Z-Bar
A Z-Bar is what the pros often use. It looks like the letter “Z” from the side.

- When to use it: You use this to get a really tight, clean edge on your carpet. It helps you tuck the edge of the carpet down and out of sight.
- How it works: One side of the “Z” goes under the carpet edge, and the other side has sharp metal teeth that grip the carpet from underneath to hold it tight. The top of the Z then meets the laminate.
Material Choices
You also have choices for what the strip is made of.
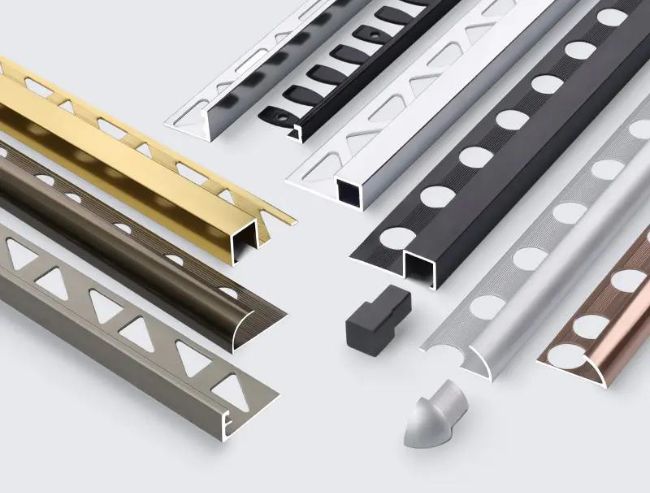
- Metal (Aluminum): These are very strong and have a modern look. They come in colors like silver, gold, and bronze.
- Wood or Laminate: You can often find a strip that matches your laminate floor color exactly. This gives you a really seamless look.
- Vinyl: These are flexible and waterproof, which makes them a good, durable choice.
Tools and Materials
Before you start, it’s a good idea to gather all your tools. There’s nothing worse than having to stop midway through a project to run to the store. Here’s what I used:
Essential Tools: 🛠️
- Tape Measure
- Pencil or marker
- Hacksaw or a miter saw (I used a hacksaw, and it worked fine)
- Power Drill (if you’re using screws)
- Rubber Mallet
- Utility Knife
- Safety Glasses and Gloves (Always a good idea!)
Required Materials:
- Your chosen transition strip
- The metal track that often comes with the strip
- Screws or construction adhesive (glue)
Installation Steps
Alright, now for the fun part! I’ll break down how I installed my reducer strip. The steps are very similar for a T-molding.
Step 1: Measure and Cut
This step is super important. Measure twice, cut once!
- I measured the width of my doorway very carefully.
- Then, I marked that measurement on my new transition strip with a pencil.
- I used my hacksaw to cut the strip to the right length. I went slowly to make sure my cut was straight.
Step 2: Get the Carpet Ready
You need to prepare the edge of the carpet so it fits perfectly.
- I pulled the carpet back from the doorway. My carpet had a pad underneath, so I used my utility knife to trim the padding back. You want to leave about an inch of space between the carpet pad and the edge of the laminate. This space is for the metal track.
- I checked the edge of the carpet itself. It was a little frayed, so I trimmed it with the utility knife to get a nice, clean edge.
Step 3: Install the Fastener
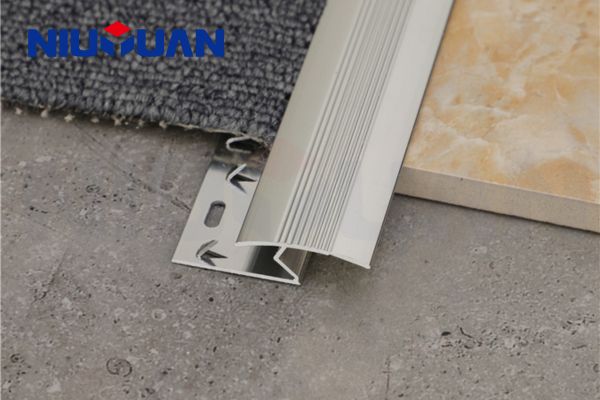
Most DIY transition strips for carpet come with a metal track that has little teeth on it. This track is what holds everything in place.
- I placed the metal track right in the center of the gap between my laminate and the carpet.
- I used my power drill and the small screws that came with the kit to fasten the track to the subfloor. I made sure it was nice and secure.
- Next, I pulled the edge of my carpet over the teeth on the track. The teeth are sharp and point towards the carpet. They are designed to grip the backing of the carpet and hold it tight. I used a little muscle to stretch the carpet slightly as I hooked it on.
Step 4: Snap in the Transition Strip
This is the most satisfying part!
- I took my cut transition strip and angled it to line up with the channel on the metal track.
- I started at one end and pressed it down.
- Then, I used my rubber mallet to gently tap along the strip from one end to the other. You’ll hear and feel it snap into place. It was a perfect, snug fit!
Tips for a Perfect Finish
I learned a few things along the way that really helped me get a professional-looking result.
- Leave an Expansion Gap: Laminate floors need to expand and contract with changes in temperature. Make sure your transition strip doesn’t pin the laminate down. The track system is great for this because it allows the floor to move underneath.
- Deal with Height Gaps: If your height difference is a bit awkward, you might need to put a thin piece of wood (a shim) under the metal track on the lower side to raise it up a bit. This helps the reducer sit level.
- Carpet Tension is Key: You really want the carpet to be tight. If your carpet feels loose, you might need to rent a knee kicker from a hardware store. It’s a tool that helps you properly stretch the carpet onto the gripper teeth.
- Test Fit First: Before you screw anything down or snap anything in, just lay your cut piece in place. Make sure it’s the right length and sits nicely. It’s a simple check that can save you a big headache.
Conclusion
And that’s it! My new transition strip looks fantastic. The connection between the hallway and bedroom is now smooth, safe, and looks completely finished.
Installing a transition strip might seem like a small detail, but it makes a world of difference. It was a pretty straightforward DIY project. The most important parts were just choosing the right type of strip, measuring carefully, and taking my time to prepare the carpet edge. By following these steps, you can absolutely get a professional-quality result on your own. Good luck with your project!