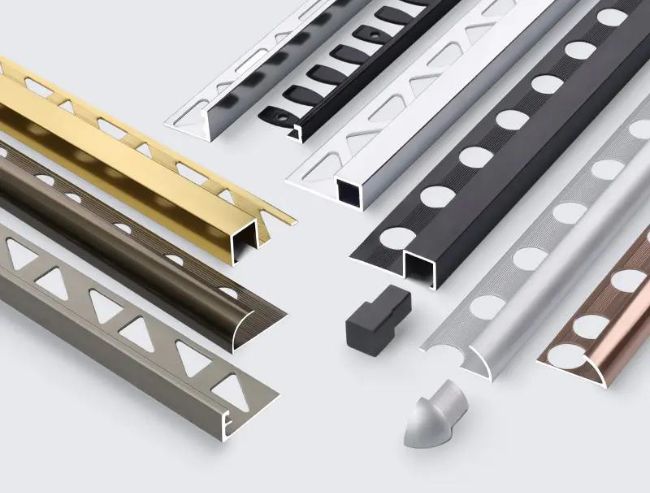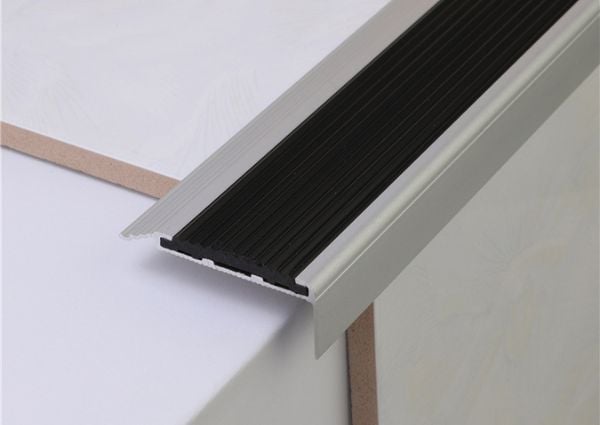

In drywall installation, a corner bead is a protective strip installed on the exterior corners of drywall. It serves dual purposes: strengthening the edges to prevent damage from everyday use and enhancing the wall’s overall aesthetics.
Whether you’re working on new construction or a renovation, installing a corner bead is an essential step to ensure the durability and strength of drywall edges. This article offers a detailed guide on how to install a corner bead, ensuring your drywall edges are both robust and visually appealing.
Materials and Tools
Before beginning the installation, gather the following materials and tools. These are critical for a smooth corner bead installation process, and having them ready will streamline your work.

Materials:
- Corner bead: Available in metal or plastic. Metal corner beads are durable and ideal for high-impact areas, while plastic ones are lighter and easier to install.
- Drywall screws: Used to secure the corner bead; 1-inch screws are recommended.
- Joint compound (Drywall mud): Applied to cover and smooth the corner bead for a seamless finish.
- Sandpaper: For sanding the joint compound; 150-220 grit is suggested for a smooth surface.
Tools:
| Tool | Description |
|---|---|
| Measuring tape | To measure the length of the drywall edge. |
| Pencil | For marking cutting points. |
| Cutting tools | Scissors (for plastic) or a saw (for metal), depending on the corner bead type. |
| Screwdriver or drill | For driving drywall screws. |
| Putty knife | For applying and feathering joint compound; 6-inch and 12-inch sizes are recommended. |
With these materials and tools prepared, you’re ready to start the installation.
Preparation
Proper preparation ensures a successful installation. Follow these steps:
Measure the drywall edge
Use a measuring tape to measure the length of the drywall corner, from ceiling to floor (or corner to corner). Record the exact length to determine the size to cut the corner bead.
Cut the corner bead
Using your measurement, trim the corner bead to the appropriate length with the right cutting tool. Cut it about 1/2 inch (1.27 cm) shorter than the measured length to allow space during installation and prevent cracking from wall settling. Ensure the cut is clean and smooth, free of burrs or uneven edges.
Clean the drywall edge
Before installing, clean the drywall edge to remove dust and debris. Use a cloth or brush to ensure a smooth surface, allowing the corner bead to adhere tightly.
Once these steps are complete, you can move on to installation.
Installation Steps
Installing a corner bead requires care and patience. Follow these steps for a secure and smooth result.

1. Position the corner bead
Place the cut corner bead on the drywall edge, ensuring it’s aligned and vertical. Use a straightedge or level to confirm it’s perpendicular to the wall, ensuring a straight corner post-installation.
2. Secure the corner bead
Fasten the corner bead to the drywall with drywall screws. Place screws every 6-8 inches (20-30 cm) along both sides, staggering them to avoid alignment. Tighten screws carefully to avoid over-tightening, which could deform the corner bead or damage the drywall.
3. Apply joint compound
- First layer of joint compound:
Using a 6-inch putty knife, apply joint compound evenly over the corner bead, covering the edges and screws. Hold the knife at a 45-degree angle, pressing lightly to smooth the surface. Aim for a thickness of about 1/8 inch (3 mm) to prevent cracking as it dries. - Feather the edges:
Gradually thin the compound edges (feathering) to blend with the wall, avoiding sharp ridges. Feather out to about 6-8 inches (15-20 cm) for a natural, smooth transition. - Drying time:
Let the first layer dry completely, typically 24 hours. Drying time varies with humidity and temperature; ensure good ventilation to speed it up.
4. Sand the surface
- Sand the first layer:
Once dry, lightly sand with 150-grit sandpaper to remove uneven spots or burrs. Sand gently to avoid damaging the drywall or corner bead. - Second layer of joint compound:
After sanding, apply a second layer with a 12-inch putty knife, covering a wider area and feathering out to 10-12 inches (25-30 cm) for a smoother finish. - Sand again:
Once the second layer dries, use 220-grit sandpaper for fine sanding to achieve a seamless surface. If needed, apply a third layer and repeat sanding until satisfied.
Completion and Maintenance
After installation, check the quality and maintain the corner bead for longevity and appearance.
Check the installation quality
- Stability:
Tap the corner bead gently to ensure it’s securely attached. If loose, add more screws. - Surface smoothness:
Inspect the corner with a flashlight for unevenness or compound buildup. Sand or add compound as needed to fix issues.
Maintenance tips
- Regular inspection:
Check corners every 6-12 months, especially in high-traffic areas like hallways. - Timely repairs:
If damage or cracks appear, repair immediately with a putty knife and sand smooth to prevent worsening.
Expert Tips and Considerations
- Choosing the Right Bead: Select based on project needs—metal for durability, paper-faced for aesthetics, vinyl for moisture resistance. Consider corner type (straight or curved) and environmental factors.
- Application Technique: Apply thin, even layers of joint compound, feathering edges to avoid visible seams. Avoid excessive pressure to prevent concave corners.
- Drying Time: Allow sufficient drying time between coats (typically 24 hours) to enhance durability and finish quality.
- Common Pitfalls: Misalignment can cause twisting, requiring removal and reinstallation. Ensure the bead is level and flush before securing, and keep spare beads handy for mistakes.
Conclusion
Installing a corner bead is vital for reinforcing drywall edges and improving their look. With this detailed guide, you can confidently complete the installation, creating strong, durable wall corners.
Whether for new builds or renovations, a properly installed corner bead adds a professional finish and extends wall life. We hope this article offers practical tips to help you achieve stronger, more beautiful drywall edges.
FAQs
How to choose the right corner bead?
Choosing the right corner bead depends on your needs: metal corner beads are durable and best for high-impact areas like public spaces or kids’ rooms, requiring screws for a strong hold, while plastic corner beads are lightweight, easy to install, and perfect for standard home projects, especially for DIY enthusiasts.
What if the corner bead isn’t vertical during installation?
If the corner bead isn’t vertical, check its alignment with a level before securing the screws and adjust its position as needed; for uneven drywall surfaces, you can place thin shims between the corner bead and drywall to ensure it sits vertically, then fasten it securely.
How to handle cracking in the joint compound?
To handle cracking in the joint compound, apply it evenly in thin layers and allow each layer to dry fully before adding the next to prevent cracks; if cracks appear, scrape off the damaged compound, reapply a thin fresh layer, feather the edges, and sand it smooth once dry.