I have always been fascinated by the small details that make a big difference in interior design. One of my favorite techniques is the shadow gap.
It is a subtle detail that creates a huge impact. It gives a space a clean, modern, and high-end feel. It makes walls look like they are floating, and ceilings seem higher. If you want a minimalist look, the shadow gap is a detail you should know about.
This guide will explain what a shadow gap is, its different types, and how you can use it in your own projects.
What is a Shadow Gap?
A shadow gap is a small recess where two surfaces meet. For example, it can be where a wall meets the ceiling or the floor. Instead of using traditional trim like crown molding or a baseboard, you leave a small, intentional gap. This gap creates a crisp shadow line.
This shadow line separates the surfaces and creates an illusion of depth. The result is a sharp, clean finish that looks very intentional and modern. It makes architectural elements appear to float, which adds a sense of lightness to a room.
4 Types of Shadow Gap Profiles
You can use shadow gaps in many different places. Each application requires a specific type of profile or trim to create the desired effect. I’ve worked with several types over the years.
Shadow Gaps for Ceilings
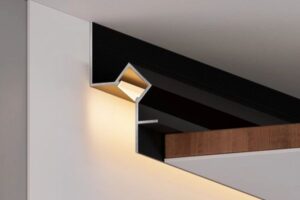
This is one of the most common uses. A shadow gap at the top of a wall, where it meets the ceiling, creates a “floating ceiling” effect. It makes the ceiling appear disconnected from the walls, which can make a room feel taller and more open.
This detail eliminates the need for traditional crown molding. It gives the room a very clean and contemporary look.
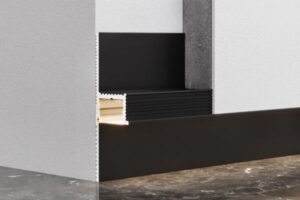
Shadow Gaps for Skirting
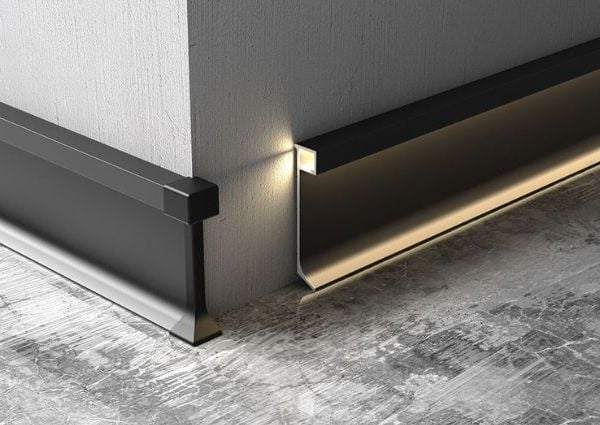
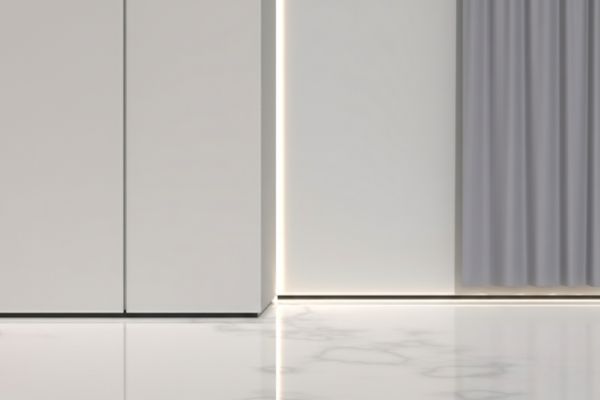
A shadow gap for skirting is used at the bottom of the wall, where it meets the floor. This is also called a recessed skirting or shadow line baseboard. The wall is held back slightly from the floor, creating a recess. This makes the wall look like it is floating above the floor.
It is a great alternative to traditional baseboards. It offers a clean, flush finish that is perfect for minimalist interiors. I find it also makes cleaning floors easier since there is no baseboard for dust to collect on.
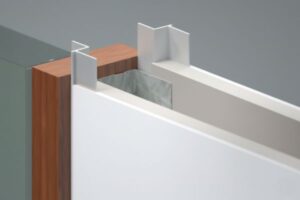
Shadow Gaps for Door Frames
You can also use shadow gaps around door frames. This technique creates a trimless door opening. Instead of bulky wood or MDF trim, a thin metal profile is installed around the door opening.
The drywall then finishes flush to this profile, leaving a small, clean gap. This gives the doorway a very sharp and frameless appearance. It integrates the door seamlessly into the wall.

Shadow Gaps for Wall Panels
Shadow gaps are also great for creating visual interest on large walls. You can use them to separate different wall panels or materials. For example, you could have a large wall with panels of wood, concrete, or fabric.
A shadow gap between each panel defines the material and adds a layer of texture and depth. It is a sophisticated way to create a feature wall.
Why Use Shadow Gap Details?
I choose to use shadow gap details in many of my projects for several reasons. First, they create an unmatched minimalist aesthetic. The clean lines and uncluttered transitions are perfect for modern and contemporary design.
Second, they can make a space feel larger and more open. The floating effect for ceilings and walls adds a sense of lightness.
Third, they can help hide imperfections. The shadow line can conceal small cracks or unevenness where surfaces meet. This is much cleaner than trying to caulk a large, visible joint.
Best Materials for Shadow Gap Profile
The trim or profile used to create the gap is very important. The material you choose affects the look, durability, and installation process.
| Material | Pros | Cons | Best For |
|---|---|---|---|
| Aluminum | Very strong, durable, creates sharp lines | More expensive, can be harder to cut | Ceilings, door frames, high-traffic areas |
| PVC | Inexpensive, lightweight, easy to work with | Less durable than metal, can look cheap | DIY projects, areas with low impact risk |
| Wood | Can be painted or stained, offers a warm look | Can warp with moisture, less sharp lines | Traditional or transitional style interiors |
| MDF | Cheap, easy to paint | Not durable, easily damaged by water | Dry areas, budget-conscious projects |
From my experience, aluminum profiles give the best and most professional result. They are strong and create the sharpest, cleanest shadow line.
How to Create a Shadow Gap?
Creating a shadow gap requires precision and careful planning. It is not as simple as just leaving a space. It involves using a special profile to ensure the gap is uniform and the edge is clean and strong.
While I often hire a professional for this, I have done it myself on smaller projects. If you are patient, the process is rewarding.
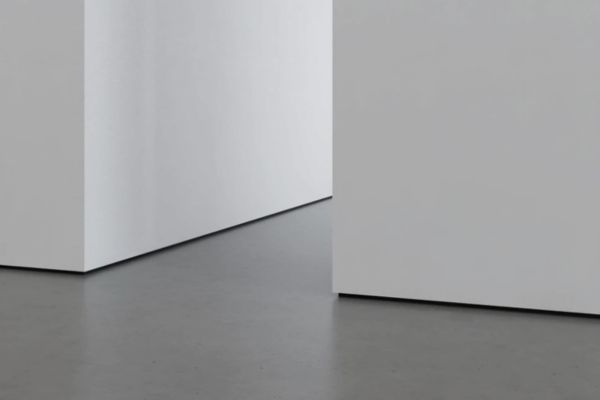
A Step-by-Step Installation Guide
To achieve a perfect shadow gap, precise execution is key. Below, I’ve broken down the process into clear steps to help you understand how it’s done.
Step 1: Planning and Preparation
Before you start, you must have a solid framing structure. The shadow gap profile gets fixed directly to the wall studs or ceiling joists. Therefore, you need to ensure your framing is straight and level. I always double-check my measurements at this stage.
Any error here will be very noticeable in the final result. You also need to purchase the right amount of profile and have all your tools ready, such as a miter saw for clean cuts, a level, and a drill.
Step 2: Installing the Profile
Once the framing is ready, you can install the profile. I cut the profiles to the required lengths using a miter saw with a blade designed for the material (e.g., metal or plastic). This ensures the cuts are clean and precise, especially at the corners. Then, I fix the profile to the framing using screws. It is crucial that the profile is perfectly level and straight. I use a long level to check this continuously as I work.
Step 3: Installing the Drywall
After the profile is securely in place, the drywall is installed. The edge of the drywall sheet must butt up snugly against the flange on the shadow gap profile. This contact is what creates the clean, sharp edge of the gap.
Step 4: Finishing the Wall
The profile has a perforated leg that gets covered with joint compound, just like you would with a standard corner bead. You need to tape and mud this joint to blend it seamlessly into the rest of the wall. This step requires skill to get a perfectly smooth finish.
Once the joint compound is dry and sanded, you can prime and paint the wall. The shadow gap itself is often painted black to enhance the shadow effect, but you can also paint it the same color as the wall for a more subtle look.
Shadow Gap Design Applications
The beauty of shadow gaps is their versatility. You can use them in many creative ways to enhance your design. It is not just about ceilings and floors.
I love finding new ways to incorporate this detail to add a custom touch to a space. It shows a real attention to detail.

Creative Uses for Shadow Gaps
Beyond the standard applications, shadow gaps can become a major design feature. They can be used to add detail, integrate technology, and solve design problems in elegant ways.
I have used them to create some unique features that really made a project stand out.
Integrating Lighting
One of my favorite techniques is to integrate LED strip lighting into shadow gaps. The recess is the perfect place to hide a light source. You can install an LED strip inside a ceiling or skirting shadow gap to create a beautiful, indirect glow.
This washes the wall or ceiling with light and makes the floating effect even more dramatic. It can serve as accent lighting or even as the main light source in a room, creating a very modern and luxurious atmosphere.
Architectural Features
You can use shadow gaps to create patterns or grids on a large wall. This can break up a monotonous surface and add a sense of rhythm and structure. I have used this to create accent walls behind a bed or in a living room.
You can also use shadow gaps to define different zones in an open-plan space. For example, a shadow gap in the ceiling can outline the kitchen area, visually separating it from the living area without using walls.
Furniture and Cabinetry
Shadow gaps are also fantastic for custom furniture and cabinetry. You can use them to create handleless doors and drawers. A small recess at the top or side of a cabinet door acts as a finger pull.
This results in a completely flat and seamless cabinet front. I also use this detail to make built-in shelves or entertainment units look like they are floating off the wall.
| Application | Design Effect | Best Location |
|---|---|---|
| Integrated LED Light | Creates a soft, indirect glow; enhances floating effect | Ceilings, skirting, staircases |
| Wall Paneling Gaps | Adds texture, depth, and rhythm to a large wall | Living rooms, bedrooms, entryways |
| Cabinetry Pulls | Creates a seamless, handleless look for cabinets | Kitchens, bathrooms, custom built-ins |
| Floating Shelves | Makes shelves and surfaces appear to float off the wall | Offices, libraries, media centers |
How to Choose the Right Shadow Gap Profile?
Choosing the right Shadow Gap Profiles is one of the most critical decisions for a successful shadow gap installation. The wrong choice can lead to a sloppy finish or installation headaches. When I’m planning a project, I break the decision down into a few key factors to ensure I get it right every time.
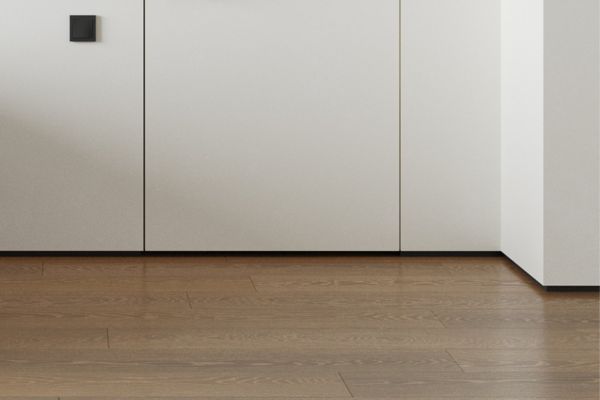
Consider the Application and Location
First, think about where the profile will be used. Different locations have different requirements.
- Ceilings: For creating a floating ceiling effect, you need a profile specifically shaped to terminate the drywall edge neatly against the ceiling joists. These are often called “L-beads” or “reveal beads.”
- Skirting/Base: A profile at the floor level needs to be extremely durable. It will get hit by vacuums and kicked by feet. I strongly recommend a robust extruded aluminum profile for this location.
- Door Frames: To create a trimless look, you need a very rigid profile that can create a durable and perfectly plumb door opening. These are specialized products that wrap around the door jamb.
- Wall Panels: For separating panels, the profile choice depends on the panel material and the desired look. You might choose a simple reveal bead for a subtle line or a deeper channel profile for a more dramatic separation.
Match the Material to Your Needs
As we covered in the table, materials matter. For a truly professional, high-end look with sharp, clean lines, aluminum is almost always my first choice. It is the most rigid and durable option. For bathrooms or other wet areas, aluminum or PVC are essential as they will not be damaged by moisture. I would avoid MDF or wood for any application where a crisp, modern line is the primary goal.
Determine the Right Size and Depth
The dimensions of the profile are not just about looks; they are a critical technical detail.
- Gap Width: This determines the size of your shadow line. A smaller gap of 10mm (about 3/8 inch) creates a subtle, minimalist look. A larger gap of 20mm (about 3/4 inch) is more pronounced and is often used when you want to integrate LED strip lighting.
- Drywall Depth: This is crucial. You must buy a profile that matches the thickness of your drywall. If you are using 1/2-inch drywall, you need a profile designed for 1/2-inch board. Using the wrong size will result in a finish that isn’t flush and will be impossible to finish cleanly.
Plan for Finishes and Special Features
Finally, consider the final look. Do you plan to install lighting? Many profiles are now designed with a built-in channel specifically for LED strips. These profiles are wider and deeper, and some even come with a diffuser cover for a smooth, even glow. Also, consider the finish. Most profiles are designed to be painted, but you can also get aluminum profiles with an anodized or powder-coated finish for a sleek, industrial look where the metal itself is exposed.
NIUYUAN’s Custom Shadow Gap Profiles
When I need something specific for a project, I often turn to custom solutions. NIUYUAN offers custom shadow gap profiles, which is a huge advantage. Sometimes, a standard size or shape just doesn’t work for a unique design.
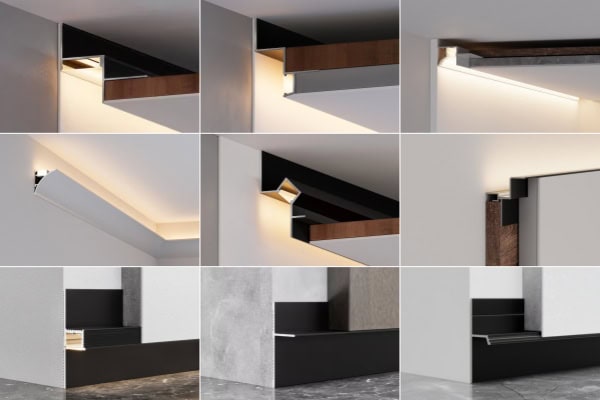
With NIUYUAN, I can specify the exact dimensions, material finish, and even color I need. This flexibility allows me to execute my vision perfectly without compromise. Their quality is consistent, and having a custom profile made ensures a perfect fit and a highly professional finish.
Conclusion
The shadow gap is a powerful design detail. It can transform a standard room into a sophisticated, modern space. It adds clean lines, creates a sense of openness, and shows a high level of craftsmanship. From floating ceilings to trimless doors, the applications are numerous.
While it requires careful planning and precise installation, the stunning result is well worth the effort. It is a detail that I believe elevates interior design from good to great.
FAQs
1. Are shadow gaps hard to clean?
No, they are not particularly hard to clean. The gap can collect some dust, but it can be easily cleaned with the brush attachment of a vacuum cleaner. For skirting gaps near the floor, a quick wipe is usually all that is needed.
2. Do shadow gaps cost more than traditional trim?
Yes, they generally cost more. The materials, especially aluminum profiles, can be more expensive than wood or MDF trim. The installation is also more labor-intensive and requires a higher level of skill, which increases labor costs. However, many people find the clean, modern aesthetic to be worth the investment.
3. Can shadow gaps be used in any room?
Yes, they can be used in almost any room. They work well in living rooms, bedrooms, kitchens, and hallways. In bathrooms, it is important to use a moisture-resistant material like aluminum or PVC for the profile to prevent any issues with dampness.